
Knowing how to quickly spin up a Linux server with desktop environment can be super useful. Whether the use-case is for development, testing/experimenting, or general tasks, this article will describe how do just that, complete with two distinct web browsers; Firefox and Chromium.
We’ll build two different flavours of Linux to provide a variety of choice and preparation method. For the Ubuntu box, I will demonstrate the use of a pre-built Digital Ocean image, and the Fedora box with a choice of bootstrap script or manual steps. This should give plenty of scope to experiment yourself further with, depending on your specific use-case or preferences.
We’ll begin with the simplest method (Ubuntu, using an image), moving on to the more manual (Fedora, using a script or by manually running commands). Finally we’ll take a look at connecting to the desktop of the new box from your local machine, be it Windows or Mac based.
Introducing Digital Ocean#
I use Digital Ocean for this sort of task, because it’s a great platform for getting up and running quickly with no existing cloud environment. While I feel that the platform is a bit more user-friendly than others, getting started can still rely on some DevOps or Sysadmin experience (hence this article). While I’ll be using Digital Ocean for demonstration purposes, the script and manual steps later will remain useful and somewhat transferable for other cloud platforms too.
A note on Terminology#
There are many words used to describe servers, such as server, box, or instance to name a few. At Digital Ocean, they refer to them as Droplets.
A note on Billing#
While running small servers for a number of hours or even days will only cost you pennies, it’s important to destroy them when you’re finished with them to avoid any unexpected bills. It’s important to understand the costs before spinning up the machines before proceeding as they can quickly sprawl out of control if you’re not careful. As a rough guide, I spun up around 10 servers when writing this article over two days and the total bill was under $2 (USD).
A note about Machine Type#
While there are other cheaper machine types available on Digital Ocean, I’ve used the 4 GB / 2 CPUs option for a couple of reasons:
- 2 CPUs and 4 GB of RAM should provide acceptable performance for the desktop while supporting KDE/GNOME, XRDP/VNC and a web browser with a couple of tabs open simultaneously.
- The basic plan ensures a good balance between cost and functionality, making it ideal for personal or lightweight tasks.
Feel free to experiment with this choice, but you will discover that if you choose a machine type that’s too underpowered, installation and use of the desktop systems can become a long and drawn out affair; whereas overpowered machines will cost more while not necessarily offering better performance.
If you don’t yet have an account, sign up at DigitalOcean. To spin up servers, you’ll probably have to add a valid payment method first. To be clear, I’m not affiliated or connected to Digital Ocean in any way.
Creating an Ubuntu Desktop (GNOME) Server with a Prebuilt Image#
This is the easiest and fastest method of getting a server online with a remote-desktop capability I’ve found so far. You can be connected to a remote desktop via VNC within 3 minutes from creating an account if you know what you’re doing.
Once you’re signed up and logged in, at the top of the screen, click Create > Droplets
On the Create a Droplet page, pick a location to build your server. The best network performance is achieved from the closest location to you. Leave the data centre and VPC options as default.
On Choose an image, select Market Place
Search for GNOME and select Ubuntu Desktop (GNOME)
Select the following options and leave the rest as defaults:
- Droplet Type: Basic
- CPU Options:
- Regular SSD
- 4 GB / 2 CPUs - SSH Key: New SSH Key
(Paste in one of your existing public keys, or proceed to follow the on-screen instructions to create a new keypair)
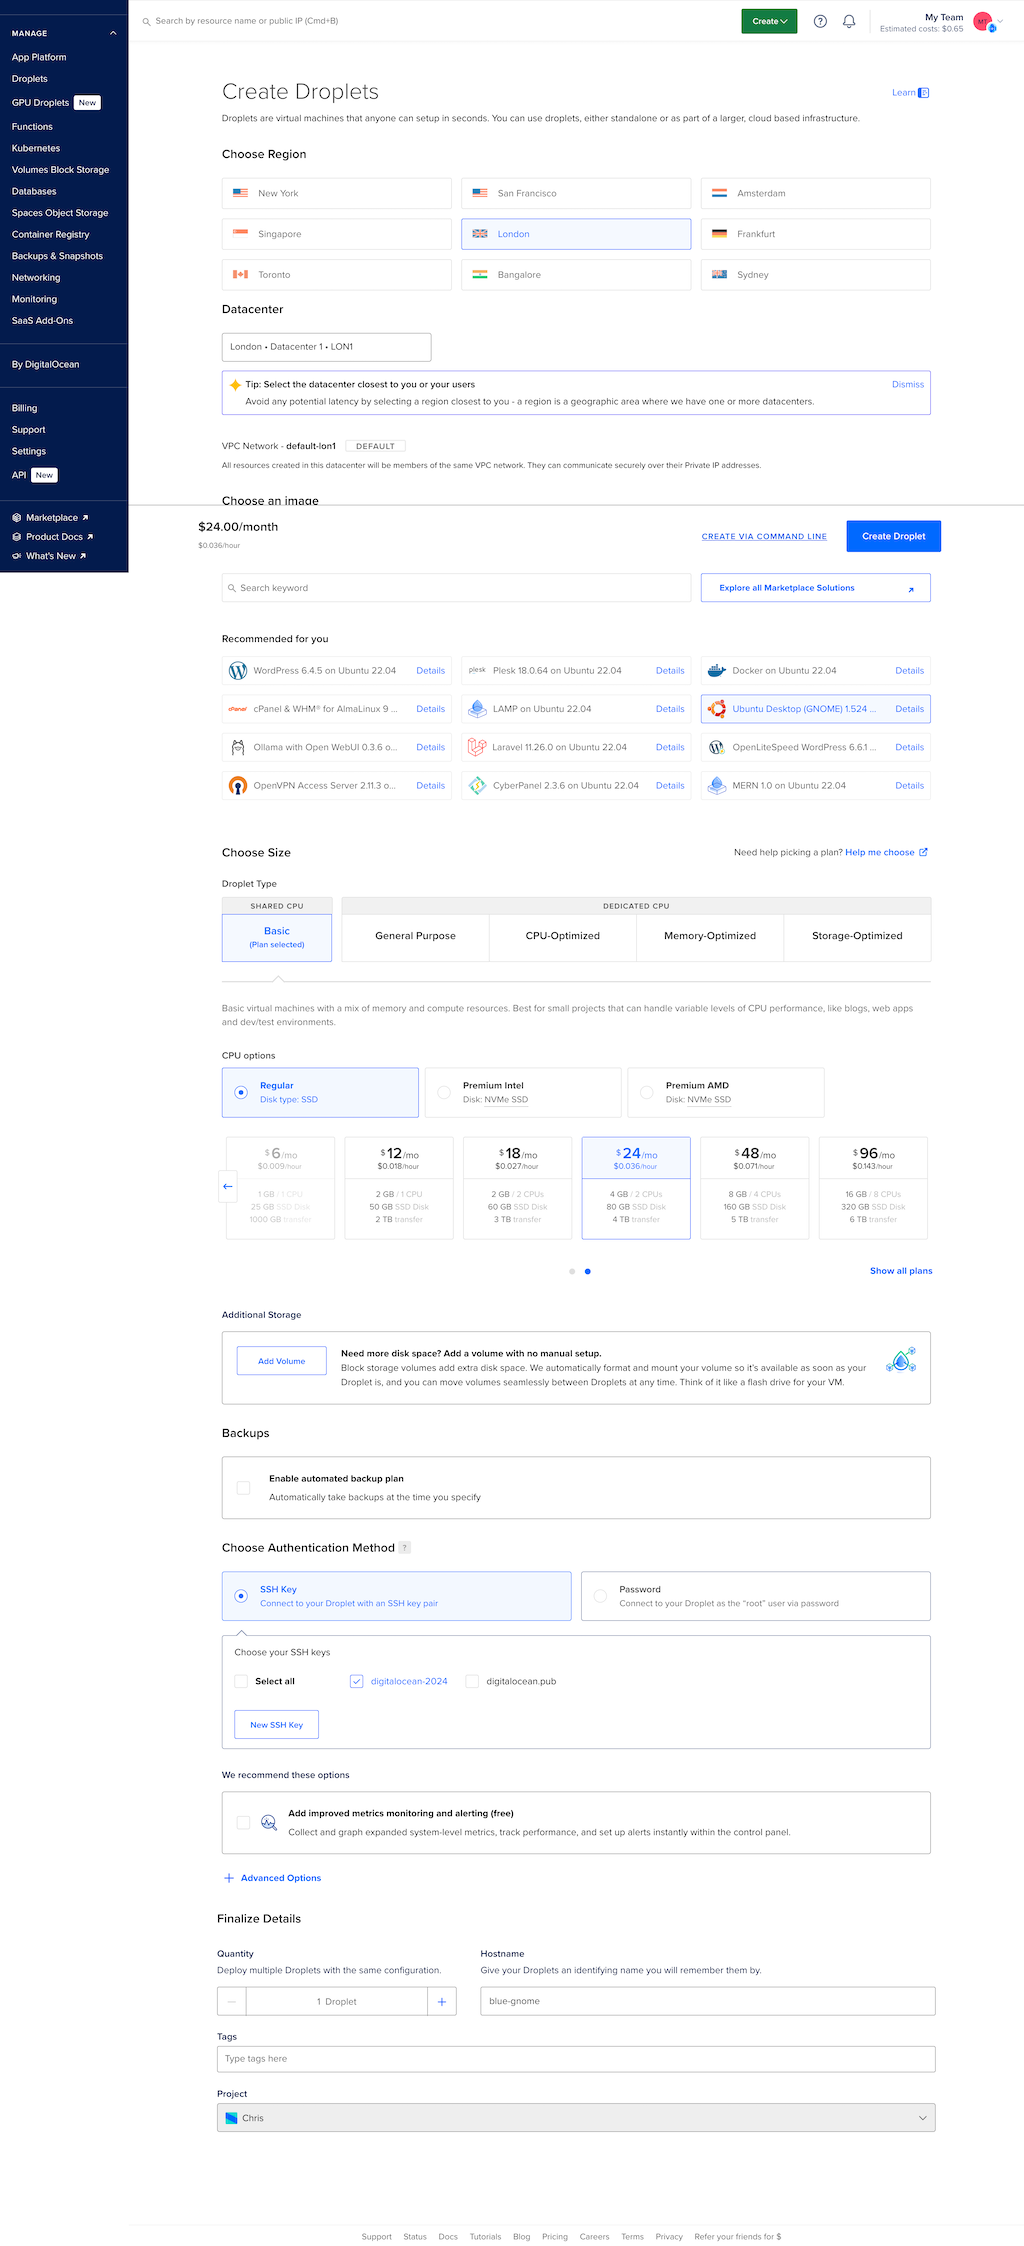
Your screen will look something like this by now:

Select Create Droplet at the bottom of the screen. It will take 30 seconds or so to provision and launch and should be ready when the IP address is shown.
SSH to the new machine from your computer. The machine may still be finishing up its build, and once the logs finish printing on screen, a VNC username (
user) and a unique password will be revealed there. This will be used for the remote-desktop connection, so make a note of these credentials.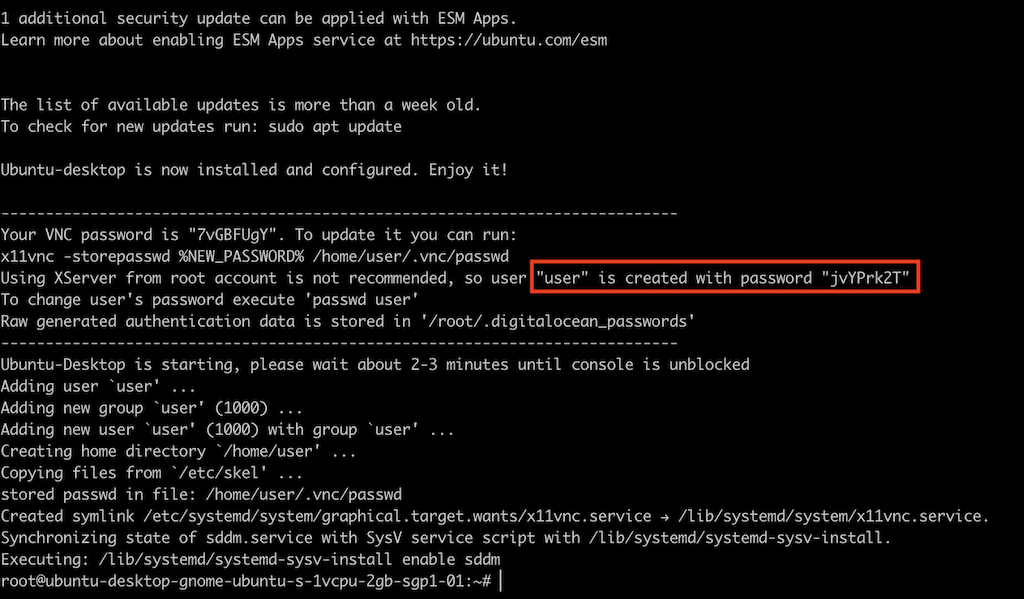
This build of Ubuntu comes with Firefox already, so we just need to install Chromium. Do so with:
apt install chromium-browserNow you’re ready to connect to the desktop!
Creating a Fedora Desktop (KDE Plasma) Server - Using a bootstrap script#
I’ve written a bootstrap script to automate the manual steps of creating this Fedora desktop machine. It’s hosted on GitHub and I’d always strongly recommend checking scripts before running them on your machines to make sure they’re not doing anything nasty.
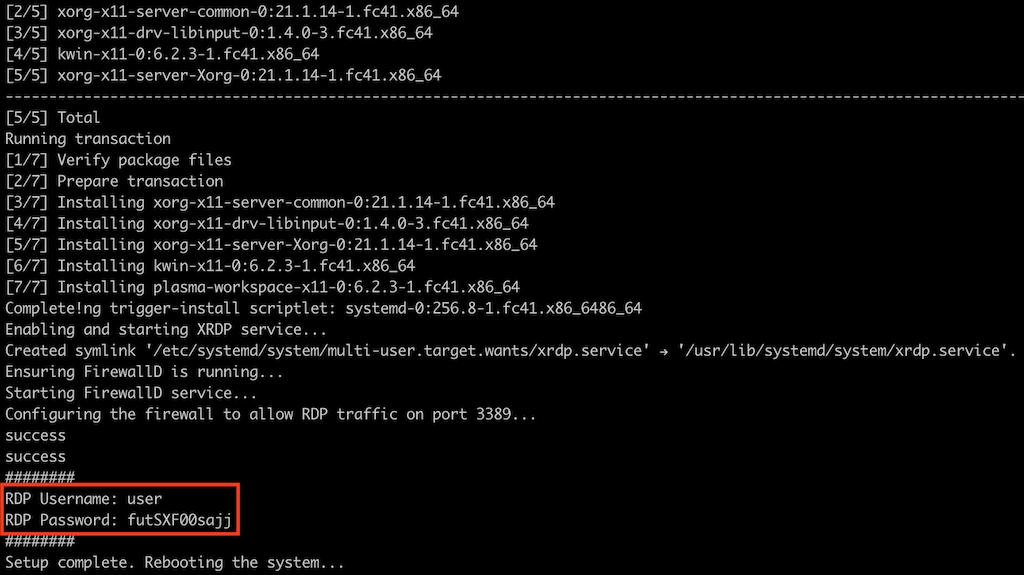
This script will handle everything, including setting up the new non-root remote-desktop user & password. The final step of the script will reboot the machine. Just before the server reboots, the username and password used to connect to the desktop will be printed on-screen, so remember to job them down in case you close the terminal window.
Once you’re signed up and logged in, at the top of the screen,
click Create > Droplets.On the Create a Droplet page, pick a location to build your server. The best network performance is achieved from the closest location to you. Leave the data centre and VPC options as default.
On Choose an image, select OS.
Select Fedora (latest version).
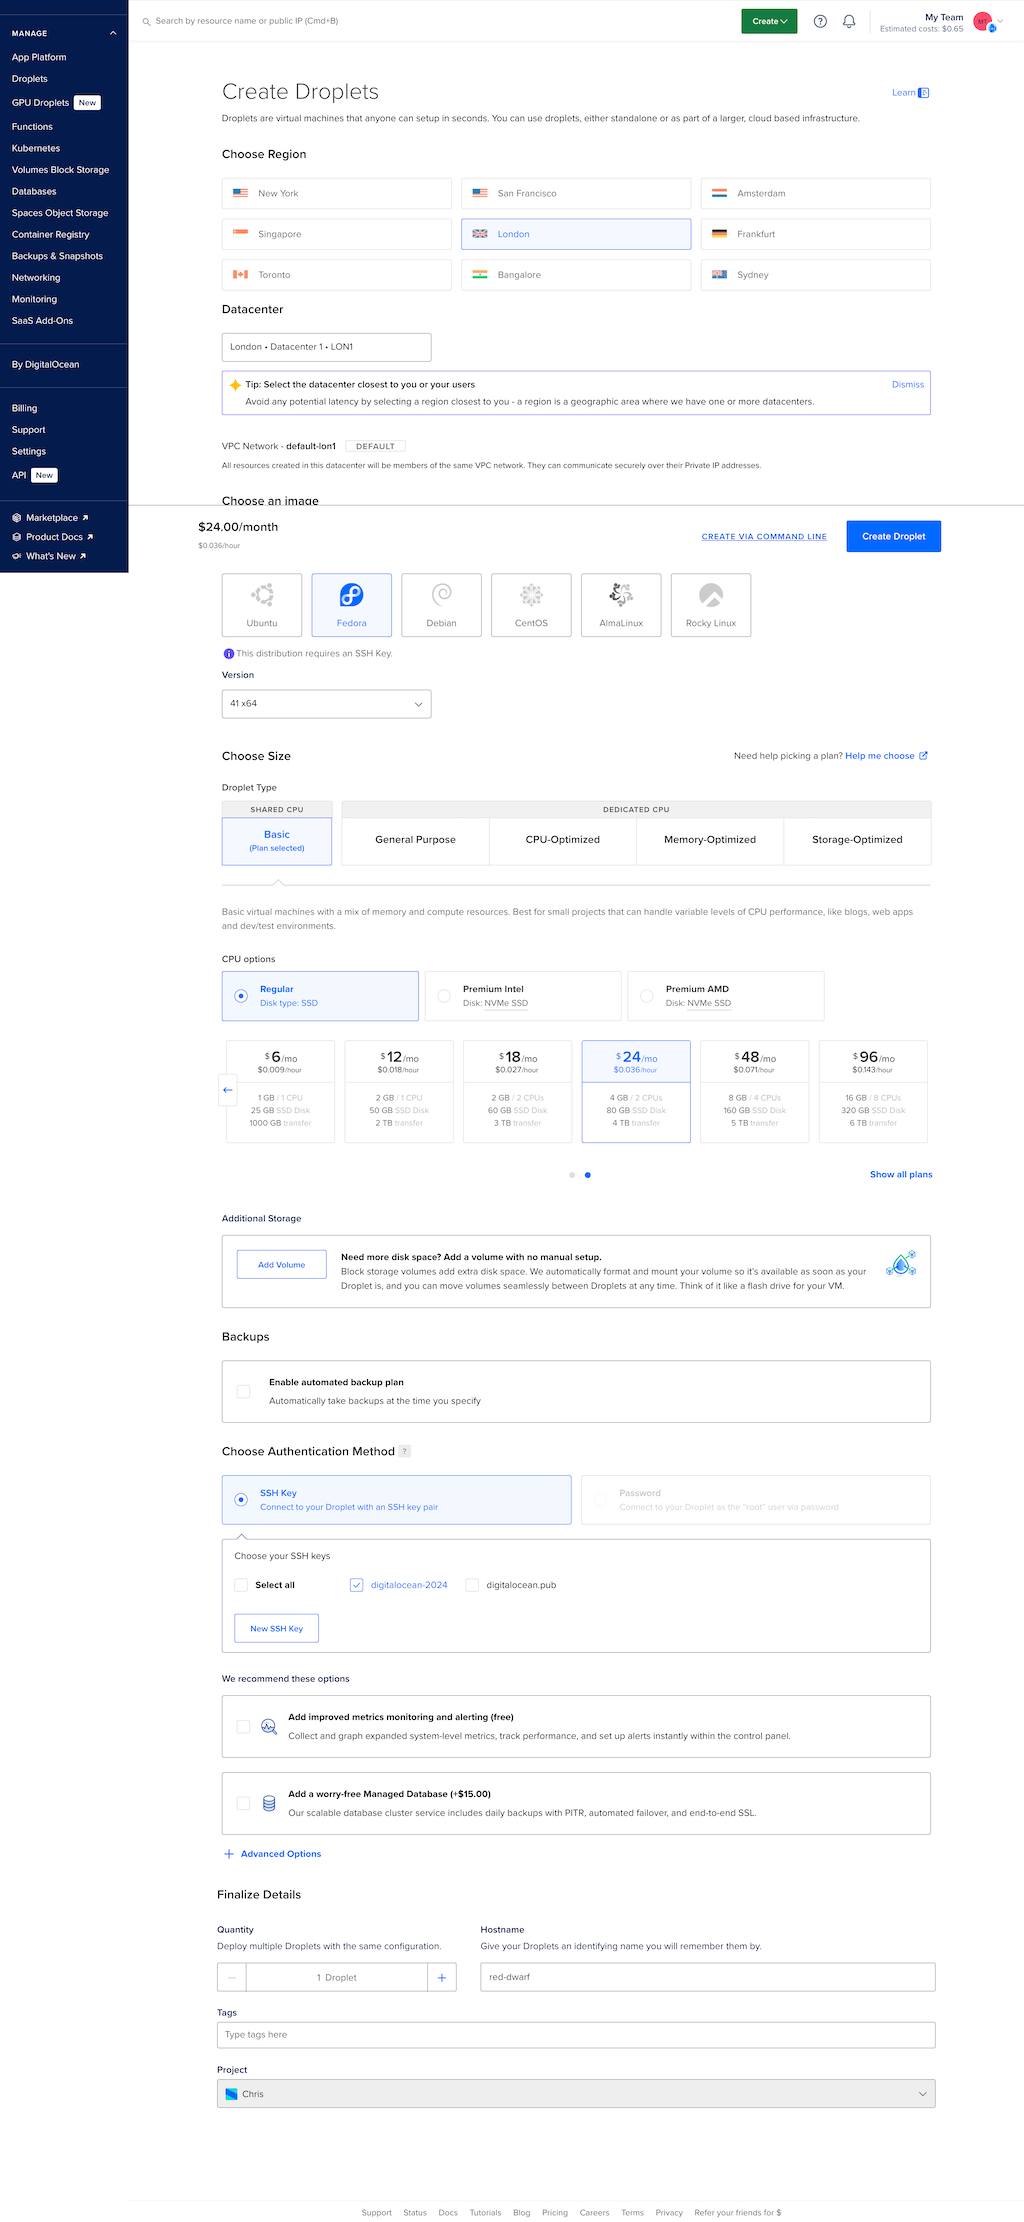
Select the following options and leave the rest as defaults:
- Droplet Type: Basic
- CPU Options:
- Regular SSD
- 4 GB / 2 CPUs - SSH Key: New SSH Key
(Paste in one of your existing public keys, or proceed to follow the on-screen instructions to create a new keypair)
Your screen will look something like this by now:

Select Create Droplet at the bottom of the screen. It will take 30 seconds or so to provision and launch and should be ready when the IP address is shown.
SSH to the new machine from your computer.
ssh -i ~/.ssh/<path/to/your/private-keyname> root@<droplet ip address>Run the bootstrap script:
curl -s https://gist.githubusercontent.com/chris-gillatt/bfccc00cb938134879b428d8ee2e6e8c/raw/setup_fedora_kde_xrdp.sh | bashThe machine will print out the XRDP username and password to access the remote desktop and reboot.
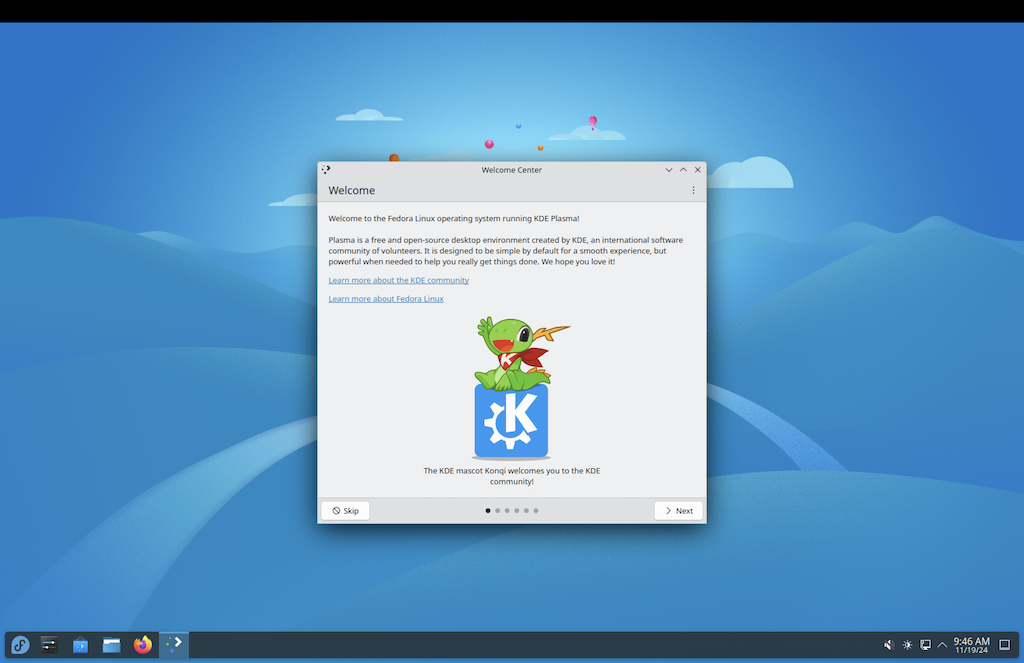
Now you’re ready to connect to the desktop!
Creating a Fedora Desktop (KDE Plasma) Server - Manually from Scratch#
If you’d rather perform the steps manually or wish to make some customisations of your own along the way, you can do so by following along the provided step-by-step breakdown.
Update all installed packages to their latest versions
dnf update -y -qCreate a user named
user, add them to thewheelgroup, and set a passworduseradd -m -G wheel user passwd userInstall the KDE desktop environment, XRDP server, and web browsers
dnf install -y -q @kde-desktop-environment xrdp firefox chromiumEnsure all necessary KDE components are installed
dnf install -y plasma-workspace-x11Start and enable the XRDP service to allow incoming RDP connections
systemctl enable xrdp --nowObtain your local Public IP address
You can obtain your public IP address on your local machine either from the terminal:curl ifconfig.meor visit a site like https://ifconfig.me in your web browser.
Optional - Add a Firewall Rule for Your IP Address only Before opening the RDP port (
3389), it’s highly recommended to restrict access to your specific source IP address for enhanced security. This prevents unauthorised users from attempting to connect.Replace
<your ip>(no chevrons) with your actual external IP address:firewall-cmd --permanent --add-rich-rule="rule family='ipv4' source address='<your ip>' port protocol='tcp' port='3389' accept" firewall-cmd --reloadAlternatively - allow All Connections to the RDP Port (Less Secure)
If your network setup makes restricting access difficult or you frequently switch between networks, you can open the RDP port for all connections:
firewall-cmd --permanent --add-port=3389/tcp
firewall-cmd --reload
⚠️ Warning: This option is less secure and should only be used temporarily or in environments with additional layers of protection.
Reboot the server to apply all changes
rebootNow you’re ready to connect to the desktop!
Connecting via RDP on macOS or Windows#
macOS: Using the Windows App#
To connect to your Fedora server from macOS, you can use the Windows App (formerly known as Microsoft Remote Desktop) available on the Mac App Store:
Download the Windows App.
- Install the Windows App from the link above.
- Launch the app and click Add PC.
- Enter your droplet’s public IP address.
- For the user account, choose “Ask me every time” or provide the credentials (the
userusername and its password obtained in the SSH session). - Click Connect, and in the next screen, choose the Xorg session.
- If you see certificate warnings, click continue.
Windows: Using the Built-in Remote Desktop App#
If you’re on Windows, you can use the built-in Remote Desktop Connection app:
- Press the windows key, and search for Remote Desktop and hit enter.
- Enter your droplet’s public IP address in the Computer field.
- Click Connect, and dismiss the certificate warnings
- A new log-in screen will appear. Continue to log in (using the
userusername and its password obtained in the SSH session).
Wrap Up#
In this article, we’ve explored how to quickly get started with a Fedora Desktop machine in the cloud, ready to connect to with RDP. Whether you chose to use the automated script or followed the manual steps, your server is now equipped for graphical remote access.
Just One more thing - remember to destroy your machine when you’ve finished with it to avoid any unexpected charges!
If you encounter any issues or have suggestions for improving the script, feel free to share your feedback in the comments section below.
Modified by Chris Gillatt.